
DobroDesk Help Center
Set up the DobroDesk website widget
Set up live chat with persistent message history from the support Inbox through the first successful customer reply.
What you'll achieve
Your website will show a Support button, new messages will reach the chosen Inbox and replies will appear in the same customer conversation.
What you need before you start
You do not need to understand or edit code to configure the widget in DobroDesk. First decide which email address customers should receive replies from, which Inbox your team should watch and which website will show the Support button.
- A connected mailbox, for example support@yourcompany.com. This is the address customers see when your team replies by email.
- A DobroDesk Inbox, for example General support or Orders. This is the work queue where your team receives widget conversations.
- Your complete website address, for example https://www.example.com. Copy it from the browser address bar without anything after the domain name.
- Access to the website admin area. If another person manages the website, you can send them the installation guide and copied code without sharing your DobroDesk password.
Each widget is saved separately. Give it a recognizable name so your team can distinguish websites or brands later.
Connect the widget to the right Inbox
In DobroDesk open Admin, choose Channels, select Website widgets and then choose Add widget.
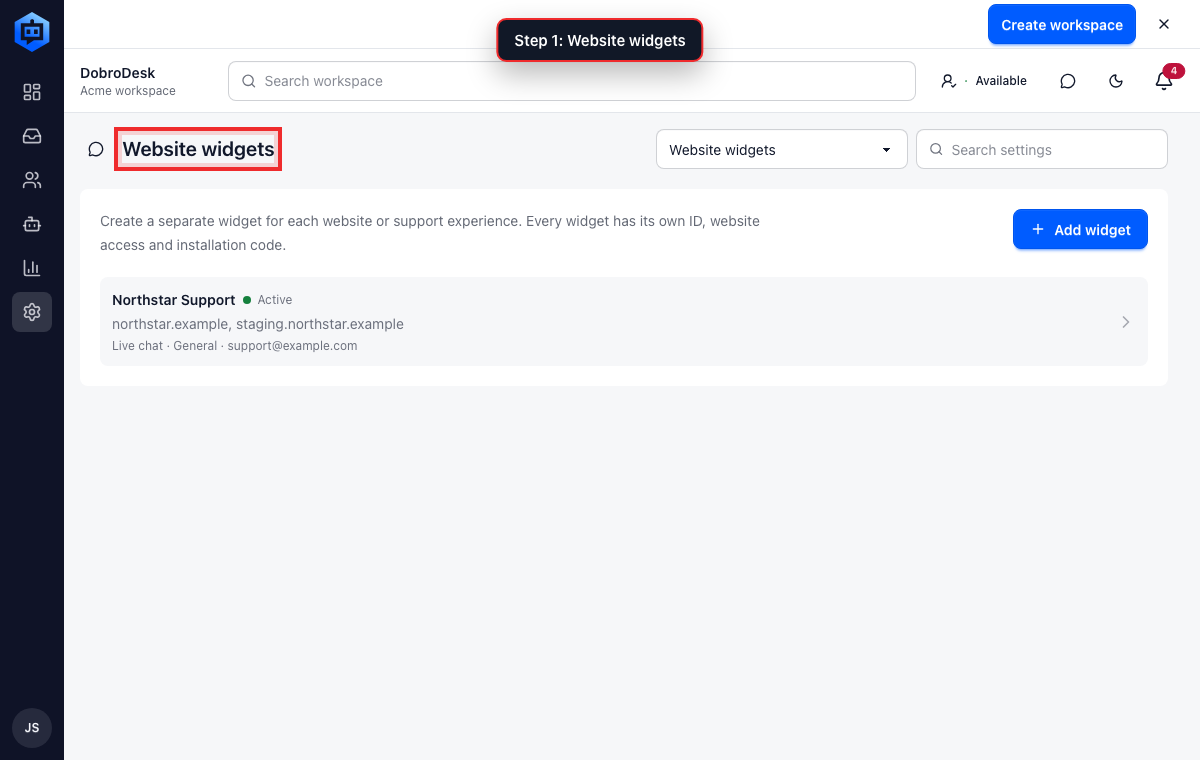
The red outline shows the control or area used in this step. Enter the support name customers should see. DobroDesk generates a random public Integration ID after creation; you do not need to choose or type one.
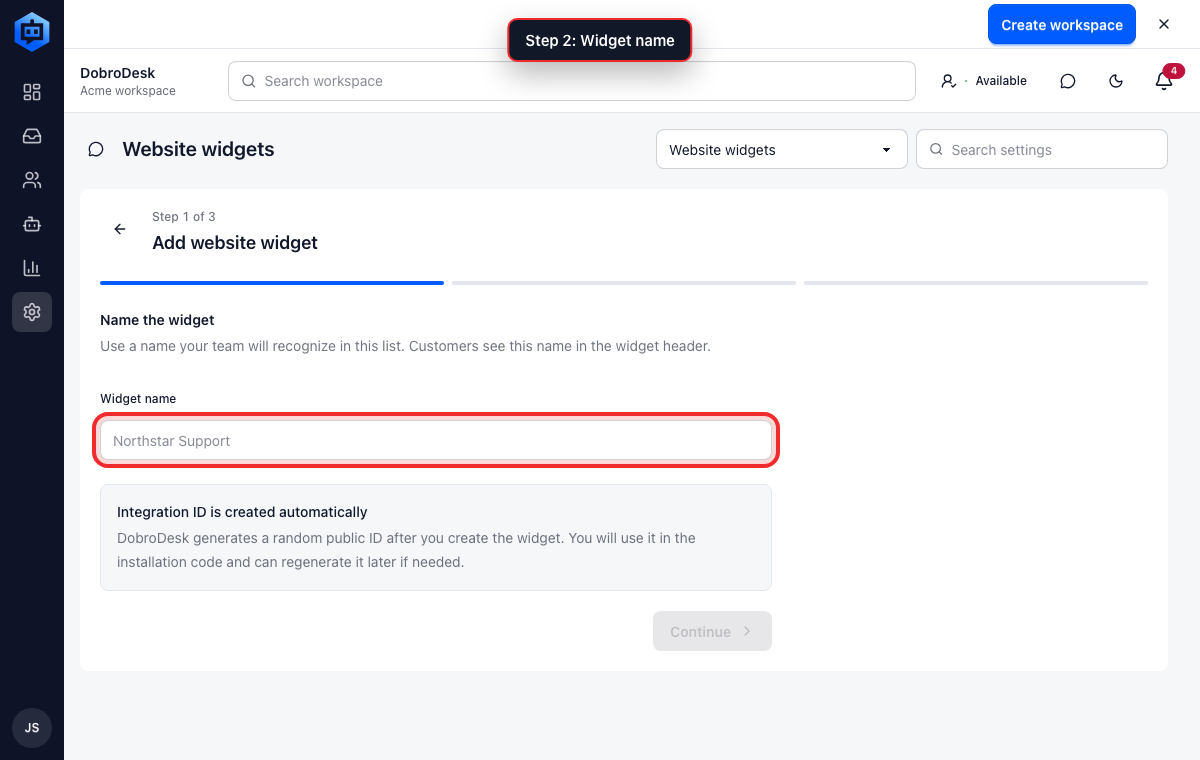
The red outline shows the control or area used in this step. Add every complete website address where this widget may appear. Put one address on each line including https://.
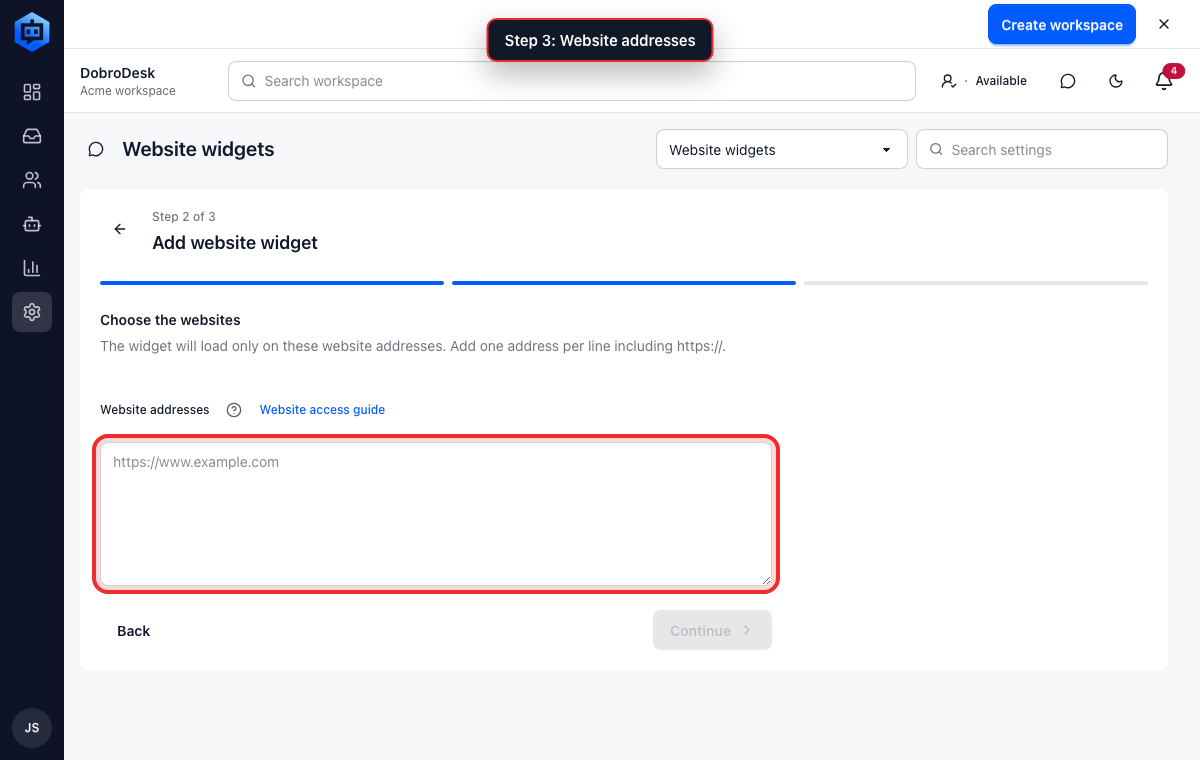
The red outline shows the control or area used in this step. Choose the reply email customers should recognize and the Inbox your team will monitor.
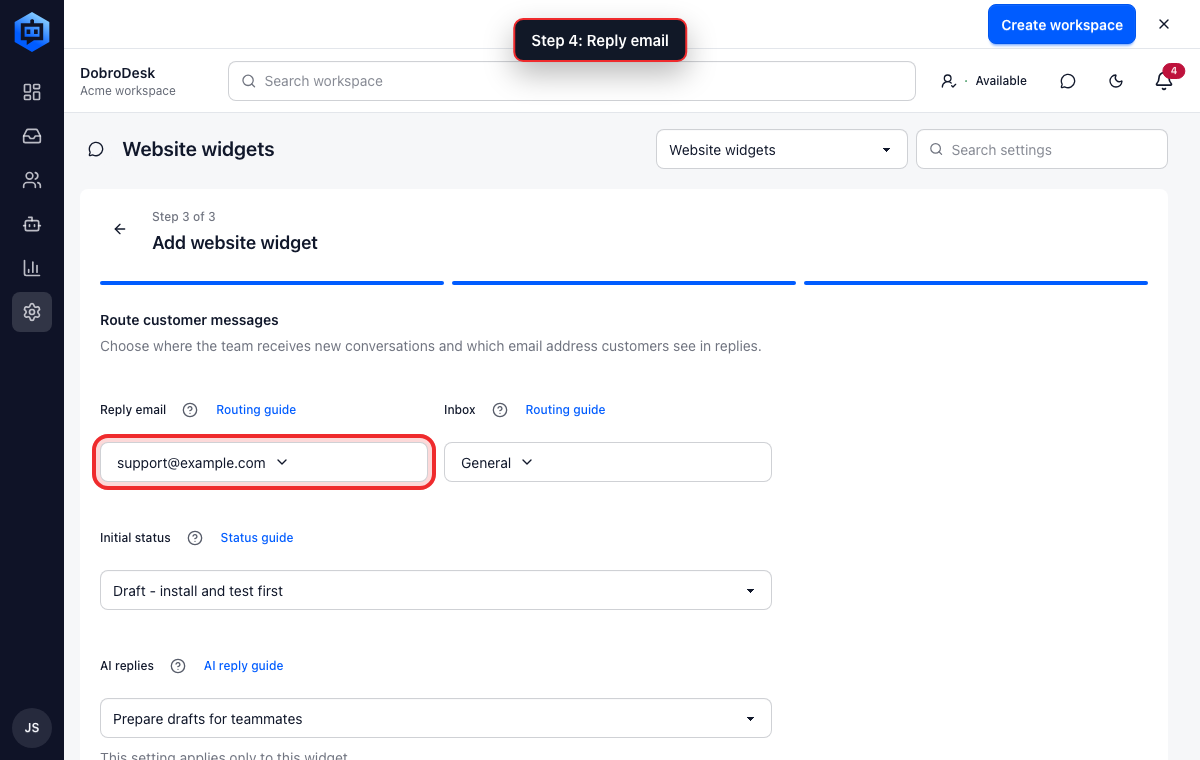
The red outline shows the control or area used in this step. Choose whether to keep the widget as a draft or activate it, then select Create widget. The new widget now appears in the widget list.
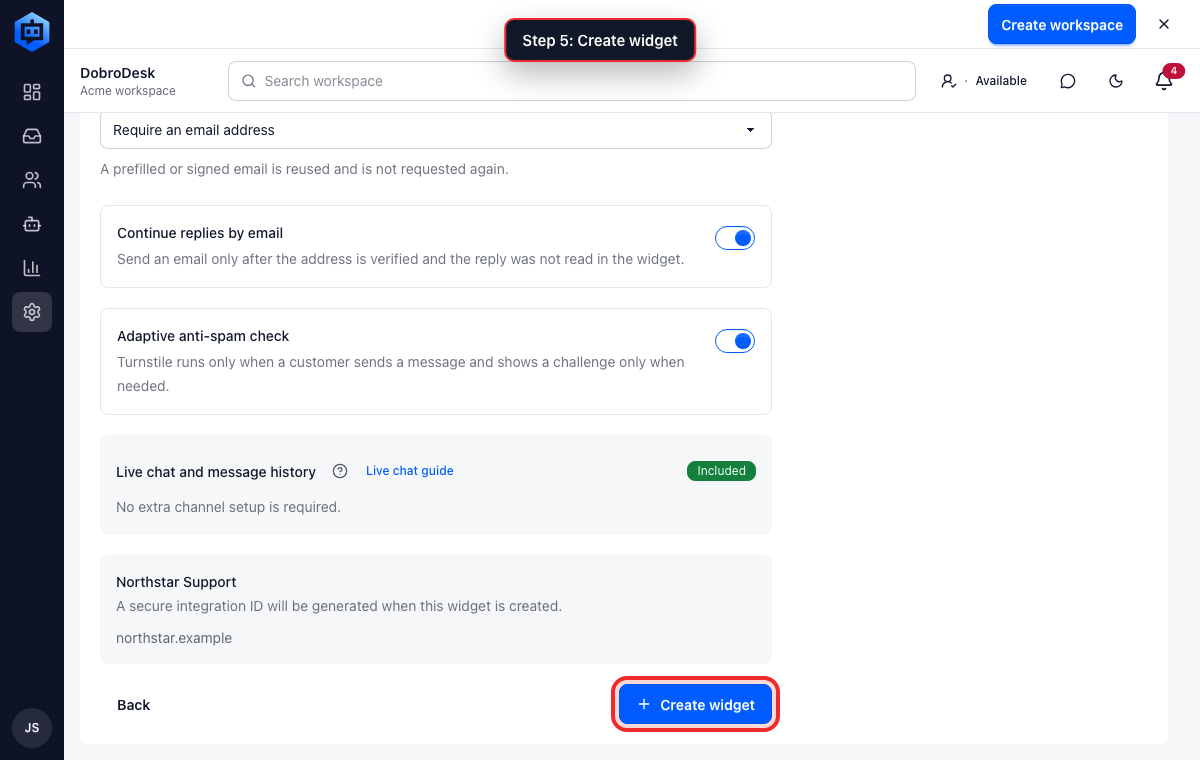
The red outline shows the control or area used in this step.
Live chat and message history are included automatically. Reply email answers 'Which email address sends replies?' Inbox answers 'Where does my team find the conversation?' Integration ID connects the installed code to this specific widget.
Add the Support button to your website
Open the widget from the list and find Widget embed configuration. It contains the exact code for this widget.
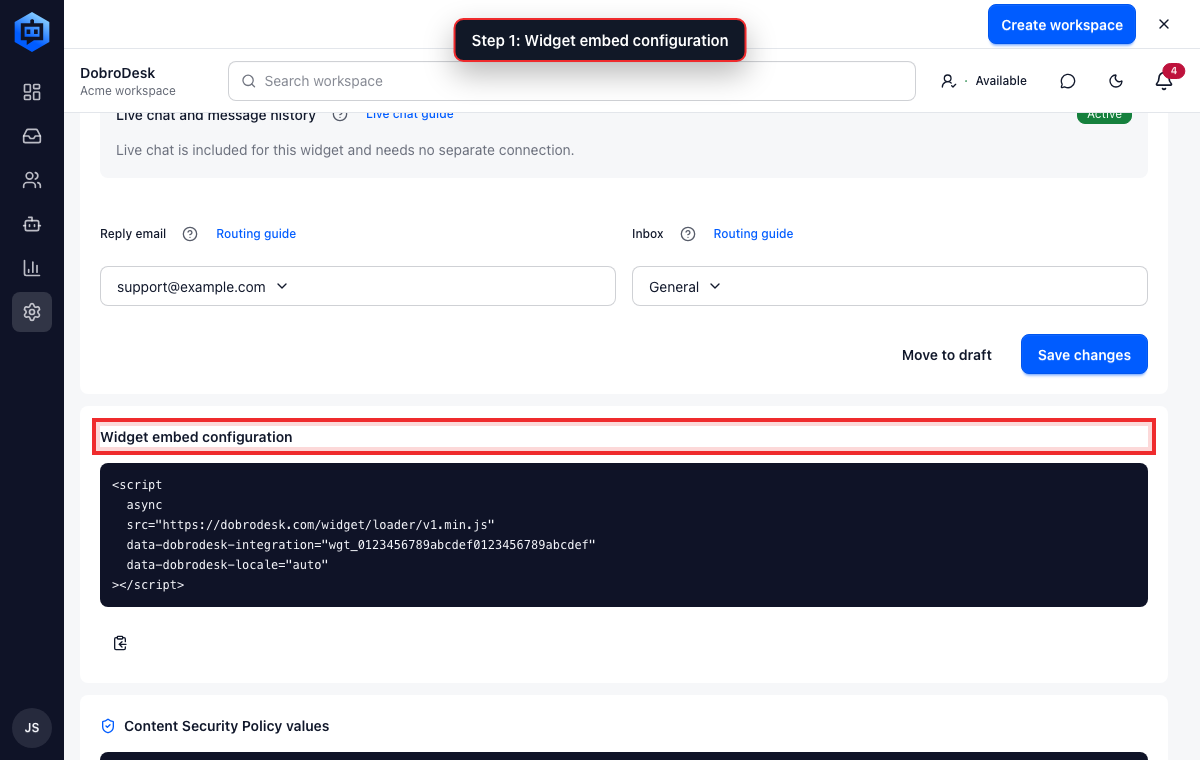
The red outline shows the control or area used in this step. Use the no-code installation guide below. In your website admin area, look for a site-wide Custom code, Footer code, Body end, Scripts or Integrations setting.
Select Copy widget code and paste the complete block once into the site-wide code field. Do not remove lines or add another script wrapper around it.
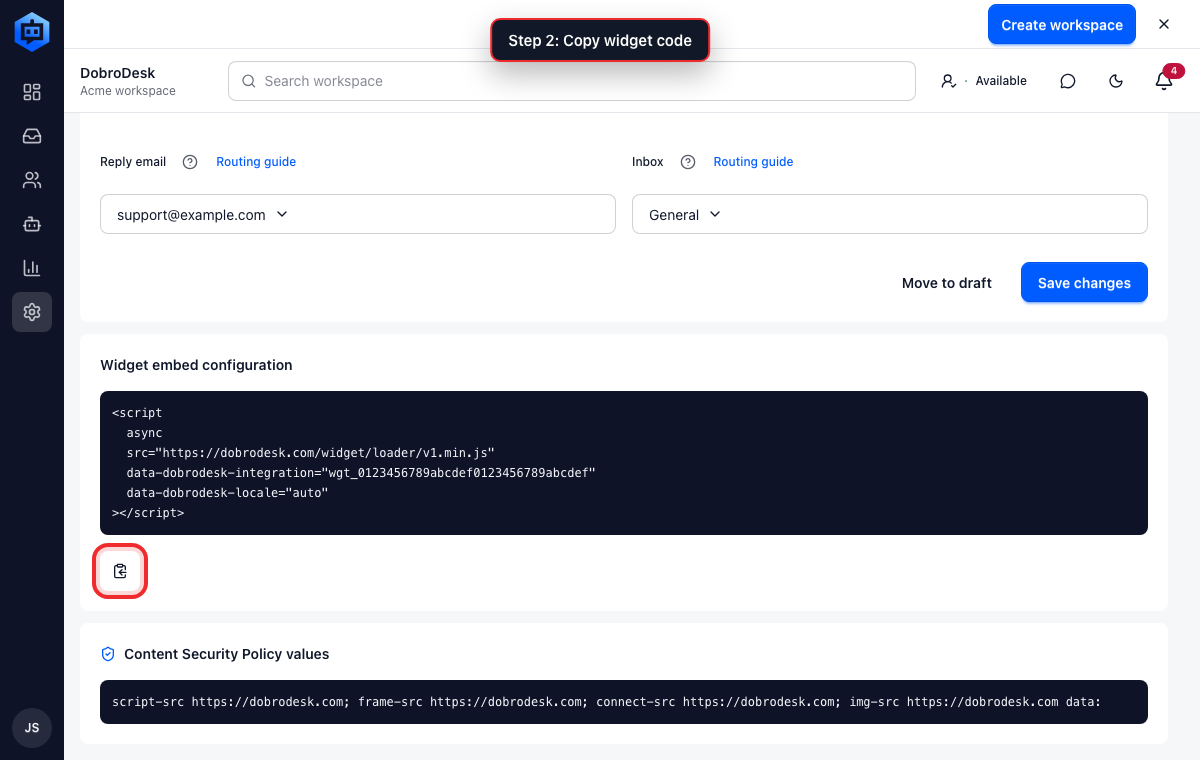
The red outline shows the control or area used in this step. Save or publish the website change. If the website uses a cache, clear it so visitors receive the new version.
Only use the advanced Content Security Policy instructions if your website administrator says CSP is enabled or the browser reports that DobroDesk was blocked.
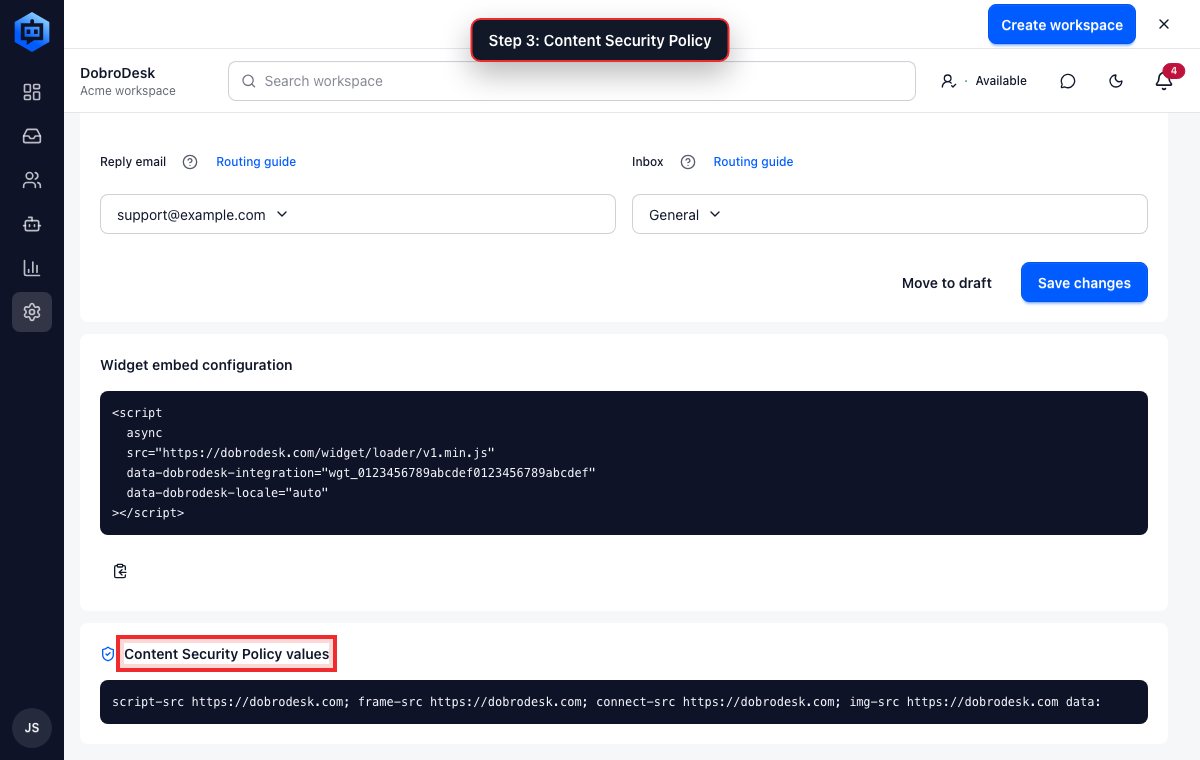
The red outline shows the control or area used in this step.
Do not paste the code into a normal page text block. It must be added to a site-wide custom code area so it can load as a script on every page where support should appear.
Send a complete test message
Open your real website in a private or incognito browser window. Find the Support button in the bottom corner and select it.
Check the support name, availability message and expected reply time. These details should make sense to a customer who does not know your internal team structure.
Open a suggested answer if one is shown. Confirm it contains only current customer-facing information.
Select Contact support, enter an email address you can access and send a message such as Website widget test - please reply.
Open the chosen Inbox in DobroDesk. Find the new conversation, send a reply and then return to the same private browser window to confirm the reply appears.
A successful test has three parts: the Support button appears, the message reaches the correct Inbox and the customer can see your reply in the same widget.
What each part of the widget does
- Support button: opens and closes the widget without moving the website page.
- Header: shows the support name and sets a simple expectation about replies.
- Availability: tells customers whether your team is online, away or offline and when they can expect an answer.
- Suggested answers: shows only approved public information that may solve common questions before a message is sent.
- Contact support: collects the customer's email address and message and creates a conversation for your team.
- Messages: keeps the customer's messages and your team's public replies together and shows new replies immediately while the widget is open.
- Inbox routing: decides which DobroDesk work queue receives the conversation. Customers do not see the internal Inbox name.
If something does not work
- No Support button: confirm the widget is Active, check its website addresses and make sure the code was added to a site-wide code area.
- Button appears but a message cannot be sent: open the widget, confirm its status and test again in a private window.
- Message arrives in the wrong place: open the widget and check its selected Inbox.
- Changes do not appear: publish the website change and clear the website or hosting cache.
- Still blocked: use the troubleshooting guide below and send your website URL, test time and a screenshot to DobroDesk support.